How to Make a Clay Pot
Jan 4th 2019
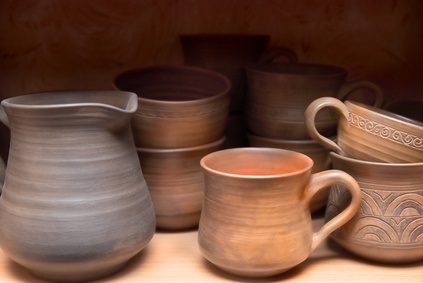
 Pottery is the ceramic act of making pottery wears. The major types include earthenware, stoneware and porcelain. The actual place where such wares are made is also called a pottery. Similarly, pottery is known to be the art or craft of a potter or the manufacture of pottery.
The venerable clay pot traces its roots deep in the ancient history. Our ancestors were in great need of vessels to carry water and store food. They found that the water resistant naturally occurring clays in the soil were ideal for making good pots. Nowadays, people buy clay pots at the store and carry water through pipes. Clay pots remain the most beautiful masterpiece thus regarded as a functional works of art and craft.
You can make a clay pot for many purposes such as cooking, or decoration. In this case, our primary focus is the clay pot for cooking. The clay pot can be made quite easily and quickly with a few inexpensive materials. Making a clay pot manually is not a difficult process.
Materials Needed
To make a beautiful clay pot manually, the following materials are required: clay (the centerpiece of the vessel), detergent, a small dish or preferably a carton which has a circular shape, colors, gouache/opaque watercolor (gives color to the vessel), a piece of cloth and lacquer.
Clay: Clay can be used to make cups, plates, and cooking pots, as well as decorative flower pots. As mentioned above, clay is the basic thing required to make the pot. So, you need to gather the clay first. To collect the amount of clay that you need from outside, you must be keen to recognize it. In its dry state, the clay may look like rocks, while in its wet state, it resembles mud. Clay is easy to break up, but doesn't easily dissolve into muddy water like the regular mixture of clay and silt would. Take some damp clay and push it up between your pointing finger and thumb. What do you get? Well-formed ribbons. Try the same procedure with sand and silt, however, no ribbons will be formed. The length of the ribbon formed is a technique scientists use to determine the amount of clay in the soil. More clay equals more ribbons.
If you wish to skip the collection process you can easily buy clay at a number of large box stores, online or in your local craft store. There are many different types of clay; the type you require will be labelled, "Pottery Clay". It should also say, "air dried" or "home fired."
Step 1
Preparing the clay: Now that you have gathered your clay, you will need to prepare the clay. Knead the clay before you start making your clay pot. Start with about ?pound of clay. Slowly warm your clay, then work out the air bubbles by kneading it with both your hands. This will help even out the consistency of the clay, eliminating lumps of soft spots, thus making it more pliable and workable. Take great care to ensure there is no folding, poking or any other action that may add air pockets and bubbles to your clay. These may cause your pot to explode in the oven.
Step 2
Roll out the clay: Once the clay is soft and warm, start rolling it into a long snake shape. This should be approximately 12-to-24 inches long. Make sure the diameter is even when it comes to thickness. The diameter will help determine the thickness of the walls of the pot you are creating. A perfect measurement for the diameter is between 1/4 to 1/2 inch thick. For easier cleaning, perform this task on a glass surface.
Step 3
Make your base: Once the clay is warm and pliable, take a fist-sized clump and roll it into a long rope known as a coil. Take one end of the snake you just rolled out and begin making a circle. The size of the circle will determine the base of your pot; therefore, you need to decide how you will use the pot to make the base accordingly. Accidents happen; so if your pot collapses during this step, simply knead the clay again to remove the air bubbles and repeat the process.
Step 4
Smoothen your pot: You have already made your base and made all the coils. It's time to strengthen your pot. To make your work more durable, strengthen the bond of your clay by smoothing the inside of the pot. As you continue coiling your clay slowly upwards, smooth your port forefinger and thumb as you go. This helps prevent your pot from cracking or falling apart. Remember you don't want your sides to appear larger than the base; otherwise the base will be unable to support the pot.
Step 5
Dry your clay pot: Your pot is ready and smooth. Once the pot is formed, you need to allow it to dry under the sun. In case you have bought air dried clay, you should dampen a towel and gently place it on the clay. This will help prevent the clay from cracking and drying too quickly. If you prefer at home oven dry clay, ensure you bake the pot at about 250F for roughly 30 minutes, depending on the pot you have made. Baking times and temperature information should be included in the package.
Step 6
Finish your pot: Your pot is all dry and ready for use. Some prefer it decorated and painted. Add some decoration or glazing as desired. First, seal the inside of the pot with a couple of coats of polyurethane, then use acrylic paints to decorate the pot. This is optional for those who love color, but you may still prefer it without decoration. Your choice. Make sure any paints, glazes or finishes you use are compatible with food and drink if you plan on using your pot.

